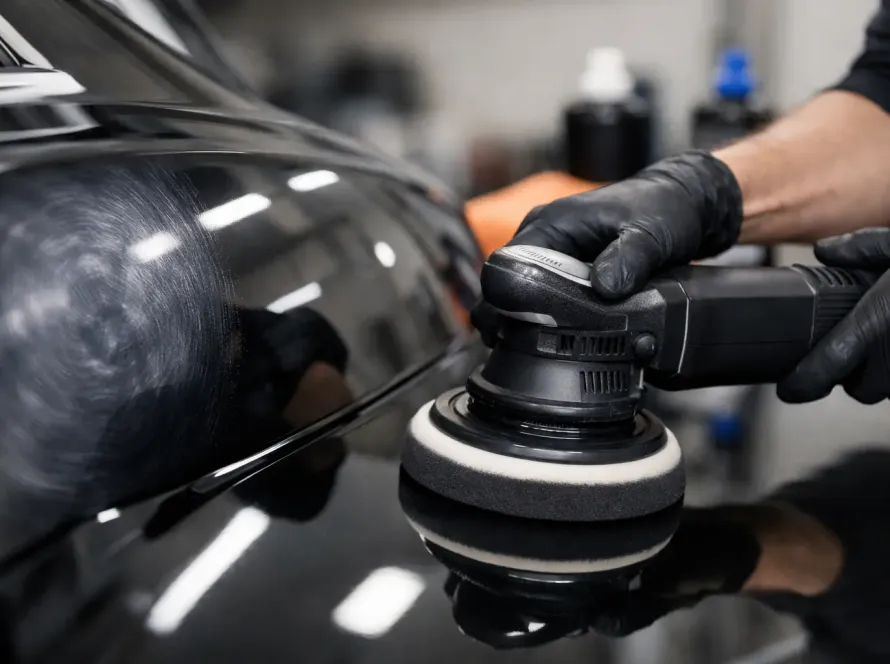
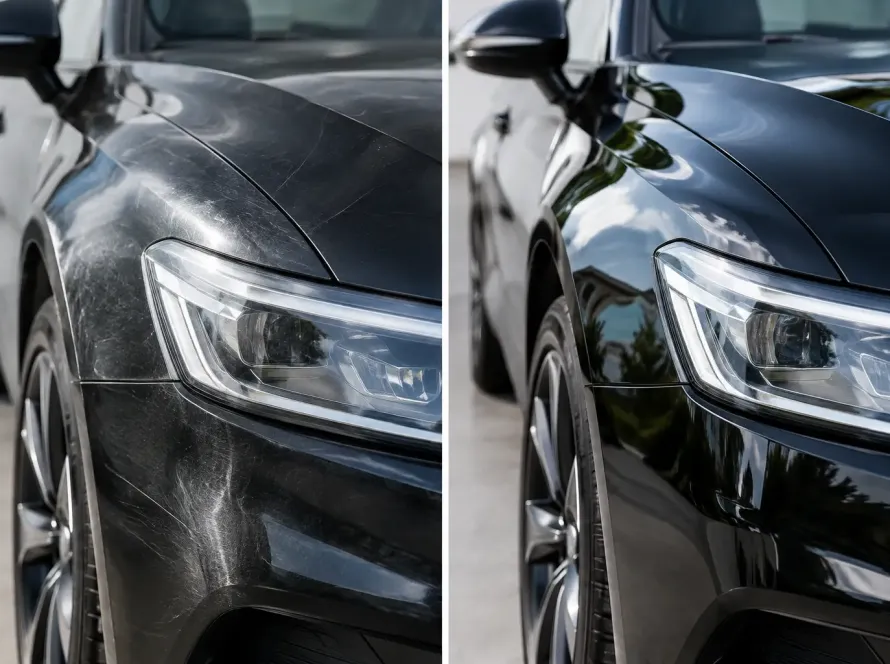
A car can look clean at first glance and still carry years of damage in the clear coat. Under direct sun, forecourt lighting or a proper inspection lamp, the truth shows itself – swirl marks, wash marring, light scratches, oxidation and dullness that flatten the finish. A proper paint correction process guide matters because correction is not just about adding shine. It is about removing the defects that stop paint from looking deep, crisp and refined.
For owners who value presentation and long-term condition, paint correction sits in a different category from a standard polish. It is a measured process of inspection, preparation, controlled machine polishing and protection. Done well, it restores clarity and gloss while preserving as much healthy clear coat as possible. Done badly, it can leave holograms, haze or unnecessary thinning of the lacquer.
What paint correction actually means
Paint correction is the controlled removal or reduction of imperfections within a vehicle’s clear coat. These defects usually include swirl marks from improper washing, fine scratches, oxidation, water spot etching, buffer trails and general dullness. The goal is not to fill defects temporarily but to refine the surface so light reflects evenly again.
That distinction matters. Many quick enhancement services rely on glazes or filler-heavy products that make paint look better for a short time. Correction, by contrast, focuses on genuine improvement. The finish should still look strong after the oils are wiped away, not only while it is fresh out of the bay.
It also helps to be realistic. Not every mark can or should be removed entirely. Deep scratches, previous poor repairs, thin clear coat and repainted panels all affect what is safe. The best results come from balancing visual transformation with responsible paint preservation.
Paint correction process guide: where the work really starts
The polishing stage gets most of the attention, but the quality of the result is decided much earlier. Before a machine ever touches the paint, the vehicle needs a full assessment and proper decontamination.
Inspection and paint assessment
Every correction should begin with a close inspection in the right lighting. This reveals the type, depth and spread of defects across the vehicle. A bonnet may only need light refinement, while doors and boot lids often carry heavier wash marks and random deeper scratches.
Paint readings can also be taken where appropriate, especially on higher-value vehicles or cars with unknown history. This helps identify thin areas, previous bodyshop work or uneven film build. It is a professional safeguard. Premium detailing is not about aggressive cutting for dramatic before-and-after photos. It is about precision.
Safe wash and decontamination
If polishing starts on a contaminated surface, the process can introduce more damage. That is why the wash stage must be more than cosmetic. Snow foam, careful contact washing, fallout removal and clay decontamination strip away bonded contaminants such as tar, iron particles and industrial residue.
At this stage, the paint should be clean enough for accurate correction and smooth enough to allow polishing pads to work properly. Trim, edges and sensitive areas are then masked to reduce risk and maintain a tidy finish.
The polishing stages explained
Correction is rarely one-size-fits-all. The right combination depends on the paint system, the condition of the surface and the result the owner wants to achieve. Some vehicles need a light one-stage refinement. Others need a heavier cut followed by one or more refining stages to recover maximum gloss.
Test spot first, not guesswork
A professional detailer will usually start with a test spot. This is a small section corrected using a chosen machine, pad and compound combination to see how the paint responds. It prevents over-correction and sets the standard for the rest of the car.
Soft paints can mar easily and may need a gentler approach even when defects seem obvious. Harder paints may require a more assertive compound and pad to achieve meaningful correction. The test spot is where experience shows.
Cutting stage
The cutting stage is designed to remove heavier defects. This is where compounds with stronger abrasive action are paired with suitable pads to level the clear coat around scratches and swirls. It is effective, but it must be controlled.
Too much cut can leave haze or micro-marring, especially on darker finishes. That is not failure – it is often a normal part of defect removal. The next stage is what restores sharpness and clarity.
Refining and finishing
Once the deeper correction is completed, the paint is refined with a finer polish and pad combination. This stage improves gloss, removes haze from the cutting process and creates the crisp, liquid finish most owners actually notice.
On black, navy, grey and other darker colours, refining is especially important. These finishes reward precision and expose shortcuts immediately. Under strong light, a rushed job can look worse than no correction at all.
Paint correction process guide: how many stages do you need?
One-stage, two-stage and multi-stage correction all have their place. The right option depends on condition, expectations and budget.
A one-stage correction suits vehicles with moderate swirl marks and general dullness where the aim is a major visual lift without chasing every defect. It can dramatically improve gloss and remove a good percentage of imperfections in a time-efficient way.
A two-stage correction is the preferred route for owners seeking stronger defect removal and a more refined finish. It combines a heavier cut with a finishing polish, often producing the best balance between correction and presentation.
Multi-stage work is more specialised. It is usually reserved for heavily neglected paint, show vehicles or owners who want the highest practical standard. This approach takes more time, more inspection and more discipline. Not every car needs it, and that honesty matters.
Why paint type changes the process
Not all paint behaves the same way. German paint systems are often harder and more resistant to light correction, while some Japanese and softer finishes can correct quickly but mark easily. Repainted panels are another variable. They may respond differently from the factory paint beside them.
This is why a fixed formula rarely delivers premium results. Correction should adapt panel by panel when needed. A skilled detailer reads the paint, not just the product label.
Climate also plays a part. In bright, high-UV environments such as Malta, neglected paint can lose depth faster, and exposed surfaces may suffer oxidation or etching more aggressively. Correction restores appearance, but protection afterwards is what helps preserve it.
What happens after correction
Corrected paint should not be left bare. Once the surface has been refined, it needs protection to maintain gloss and reduce future wear. This could be a quality wax, paint sealant or ceramic coating depending on the owner’s priorities.
Wax offers warmth and shine, but durability is limited. Sealants tend to give stronger longevity and chemical resistance. Ceramic coatings offer the highest level of long-term surface protection, improved wash behaviour and easier maintenance, though they require proper prep and careful application.
Protection does not make the paint invincible. It simply gives the corrected finish a better defence against UV, contamination, wash marring and environmental exposure. If a vehicle has just gone through careful correction, protecting that investment is the logical next step.
Common mistakes that ruin results
Most poor correction results come from impatience. Skipping decontamination, using the wrong pad and polish combination, overworking edges, chasing defects that are too deep and failing to inspect properly between stages all create problems.
Another common issue is confusing gloss with correction. A panel can look shiny from polishing oils yet still be full of defects. Proper wipe-downs and honest inspection are essential.
Maintenance errors after correction are just as costly. Automatic car washes, dirty sponges and poor drying habits can quickly reintroduce swirls. Once corrected, the paint should be washed using safer methods if the finish is to stay at its best.
Is paint correction worth it?
For owners who care about presentation, value retention and the standard of their vehicle, yes – when it is done properly. Paint correction restores the finish in a way a standard valet simply cannot. It sharpens reflections, revives colour depth and removes the tired look that drags down the whole car.
It is especially worthwhile before applying ceramic coating, preparing a vehicle for sale, reviving an enthusiast car or simply bringing pride back to a daily driver. The return is visual, but it is also practical. Better paint condition supports better protection and easier maintenance over time.
At GloboWax Malta, the difference is in the discipline of the process. Premium results do not come from rushing a machine over the paint. They come from inspection, restraint, skilled correction and protection chosen to suit the vehicle.
A well-corrected finish changes the way a car is seen from every angle, but the real value is quieter than that. It is knowing the surface has been restored properly, protected intelligently and treated with the level of care the vehicle deserves.